… for Adobe Premiere Pro CC

Tip #130: Edit Without Touching the Mouse!

Larry Jordan – https://LarryJordan.com

The secret is in the Source Monitor.

Tip Screen Shot

Topic $TipTopic

Alex Macleod, writing in the Nov/Dec 2019 issue of KitPlus, pointed out this super-quick way to review and edit clips.

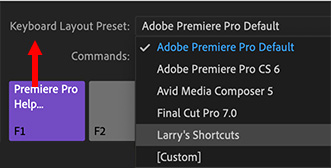
First, keep these keyboard shortcuts in mind:

  • Shift + 1. Makes the Project Panel active
  • Shift + 2. Makes the Source Panel active
  • Shift + 3. Makes the Timeline active
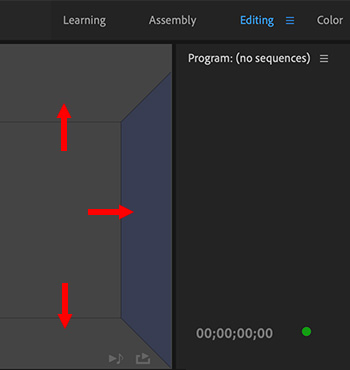
  • Shift + 4. Makes the Program Monitor active.

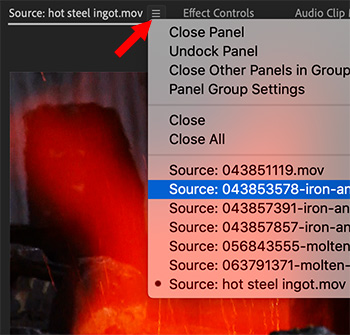
Second, remember you can load multiple clips into the Source Monitor by:

  • Selecting the clips you want to open in the Project panel
  • Control-click one of the selected clips and choose Open in Source Monitor

Third, as you review these clips in the Source Monitor:

  • Press I to set an In
  • Press O to set an Out
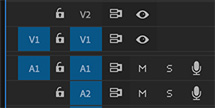
  • Press period [ . ] to edit the clip into the active track in the Timeline.

Everything you need to edit your clips without once touching the mouse.

NOTE: Learn more about the KitPlus Magazine here.


Please rate the helpfulness of this tip.

Click on a star to rate it!

… for Adobe Premiere Pro CC

Tip #134: What Do These Video Track Header Icons Do?

Larry Jordan – https://LarryJordan.com

Track Headers provide control when editing a sequence.

Tip Screen Shot

Topic $TipTopic

(See Tip 143 for an explanation of the audio track headers.)

Looking at the video track headers (located on the extreme left side of the timeline), here’s what each of these icons mean:

  • Blue V1 (far left). This icon indicates the “active track.” When you edit a clip into the timeline using a keyboard shortcut, the video goes into the track at the position of the playhead with the blue highlight. (Adobe calls this “Source Patching.”)
  • Lock. This locks a track so you can’t make changes. However, be careful with this because if you lock the video, but don’t lock the audio (or vice-versa) you can easily move the unlocked track out of sync.
  • Blue V1 (middle). When you copy a clip, the clip will paste into the LOWEST NUMBERED track with a blue highlight. Drag the blue to change track location, click it to turn it on or off. (Adobe calls this “Track Targeting.”)
  • Sync lock. Normally, when doing an insert edit, you want everything to shift down with the inserted media. This is the default setting. However, turning sync locks off means that when you insert a clip, any clips on tracks where sync lock is turned off will not move. This can be a powerful feature when you want to insert a video clip, but not break the audio tracks.
  • Eye (far right). This make the entire contents of a track visible or invisible. I generally use this when I’m working with a multi-layer composite and I want to see what’s underneath a clip.

BONUS

Watch what happens when you click one of these controls while pressing Shift, Option or Cmd. These modifier keys allow you to control groups of these switches.


Please rate the helpfulness of this tip.

Click on a star to rate it!

… for Adobe Premiere Pro CC

Tip #033: What Is the Mercury Playback Engine?

Larry Jordan – https://LarryJordan.com

A software framework to enhance performance.

Tip Screen Shot

Topic $TipTopic

The “Mercury Playback Engine” is the name for a large number of performance improvements that first appeared in Adobe Premiere Pro CS5. These improvements continue to expand with each release.

If you have a supported GPU, this acceleration is handled by the card. If you don’t, acceleration is handled in software. Hardware (the card) is always faster.

The Mercury Playback Engine improves the speed of:

  • Real-time effects playback
  • Rendering for preview and final output
  • Visual effects
  • Image scaling
  • Deinterlacing
  • Blend modes
  • Color space conversion

However, most of the time, it does not affect the speed of encoding or decoding media.

Whe you are creating a new project, Mac users should select the Metal option. Windows users should select CUDA if they have nVidia graphics cards or OpenCL for AMD or other GPU options.


Please rate the helpfulness of this tip.

Click on a star to rate it!

… for Adobe Premiere Pro CC

Tip #047: Pretty Panel Moves

Larry Jordan – https://LarryJordan.com

Panels are at the heart of the Premiere interface and… they are shifty!

Tip Screen Shot

Topic $TipTopic

The Premiere interface is very fluid. Any panel can be dragged anywhere – including outside the interface to become a floating window, or moved to a second monitor.

Here’s how:

Grab the title bar of the panel you want to move and drag it.

As you move it purple “wedges” appear at the edges of other panels. Here’s what they mean:

  • Right wedge (illustrated in this screen shot). The panel you are dragging will appear to the right of the panel with the wedge in it.
  • Top wedge. The panel will appear above the panel with the wedget.
  • Bottom wedge. The panel will appear below the panel with the wedge.
  • Left wedge. The panel will appear to the left of the panel with the wedge.
  • Center box. The panel will appear in the same panel bar as the one with the blue box.

This is a lot harder to explain than to do. Grab a panel, drag it and watch what happens.

EXTRA CREDIT

If you like your work, select Window > Workspaces > Save Changes to this Workspace.

If you don’t like it, select Window > Workspaces > Reset to Saved Layout.


Please rate the helpfulness of this tip.

Click on a star to rate it!

… for Adobe Premiere Pro CC

Tip #051: Pick Your Favorite (Shortcuts)

Larry Jordan – https://LarryJordan.com

Don’t like the shortcuts available? Pick something different!

Tip Screen Shot

Topic $TipTopic

If you are migrating to Premiere from other NLE software you don’t need to give up your favorite keyboard shortcuts. In fact, Premiere comes pre-installed with four different sets to choose from:

  • Premiere Pro Default
  • Premiere Pro CS6
  • Avid Media Composer
  • Final Cut Pro 7

To select switch between sets, open Keyboard Shortcuts (under the Premiere menu on Macs, or the Edit menu on Windows).

Then, in the top left corner, select the set you want to use in Keyboard Layout Preset.

Instantly, you are back home again.


Please rate the helpfulness of this tip.

Click on a star to rate it!

… for Adobe Premiere Pro CC

Tip #022: 2 Export Options You Don’t Need

Larry Jordan – https://LarryJordan.com

These options have been puzzling editors for years.

Tip Screen Shot

Topic $TipTopic

You are ready to export your final project, when you come face-to-face with two inscrutable checkboxes. Ever wonder how to set these options in the Export window of Premiere? We’ve got the answer.

  • Maximum Bit Depth. If you have a GPU, Maximum Bit Depth is irrelevant as you’re already getting that performance from the GPU, if it is applicable to your media. Turn this off.
  • Maximum Render Quality. If you have a GPU, this, too can be turned off. The only reason to turn it on is if you are scaling your images – up or down – and see jagged edges on clearly defined diagonal lines. As of this time, scaling is still CPU-based, and only effects calculated using the CPU are affected by this setting.

Now you know.

As you can probably guess, as Adobe migrates from CPU-based effects to GPU-based effects both of these options will become unnecessary and probably disappear.


Please rate the helpfulness of this tip.

Click on a star to rate it!

… for Adobe Premiere Pro CC

Tip #122: What is Auto Save Actually Saving?

Larry Jordan – https://LarryJordan.com

Auto Save can protect you from catastrophe.

Tip Screen Shot

Topic $TipTopic

By default, Auto Save saves a copy of your Project file every 15 minutes in the same location as your project.

NOTE: You can change the Auto Save location in Project Settings > Scratch Disks.

However, by default, Auto Save does NOT save your current project or media. Think of Auto Save as a backup file in case something really bad happens to your main project file. As well, if you don’t make any changes to your project for 15 minutes, it does not create a new Auto Save file.

Also, by default, it saves up to 20 versions. When it saves the 21st version, the oldest version is deleted. This means that it only keeps the 20 most recent versions of your project file to avoid filling your hard disk with backups.

You can have Premiere automatically save the project you are working on by checking the Auto Save also saves the current project(s) checkbox in Preferences > Auto Save.

I tend to leave this option off because I want to decide when to save my project – in case I’m experimenting and don’t want all those changes saved… yet.

But, automatically saving a project file can decrease your stress if you are someone who tends to forget to save frequenty.

Also, if you have a fast enough Internet connection, you can backup your project files, but NOT your media, to the Creative Cloud. My Internet connection is far to slow to make this viable.


Please rate the helpfulness of this tip.

Click on a star to rate it!

… for Adobe Premiere Pro CC

Tip #133: Open Sequences Between Projects

Larry Jordan – https://LarryJordan.com

Premiere supports opening unlimited sequences from any project!

Tip Screen Shot

Topic $TipTopic

Premiere allows you to open (more accurately, “import””) one or more sequences from different projects. This makes it easy to share work between projects. Here’s how:

  • Open, or create, the project into which you want to import a sequence.
  • Open the Media Browser.
  • Navigate to the project file that contains the sequence you want to open. Then, double-click it.
  • A message appears saying that Premiere is starting the Dynamic Link database. This technology allows different Adobe apps to share data between apps.
  • After a few more seconds, all the sequences, bins and clips in that project are displayed in the Media Browser.
  • Right-click the sequence you want and choose Import.

Virtually instantly, this project will appear in the Program panel.

NOTE: This simply imports a sequence, it doesn’t link them. Any changes you make are not reflected back to the original project.


Please rate the helpfulness of this tip.

Click on a star to rate it!

… for Adobe Premiere Pro CC

Tip #007: Magic Markers

Larry Jordan – https://LarryJordan.com

Five Marker Tricks That Help You Get Organized

Tip Screen Shot

Topic $TipTopic

To add a marker, position the playhead in the timeline where you want to locate a marker and type M. This adds a Cue marker at the position of the playhead.

  • Shift + M jumps the playhead to the next marker
  • Shift + Cmd + M (Windows: Shift + Cntrl + M) jumps the playhead to the previous marker.
  • Option + M deletes the selected marker.

To convert a marker to a range marker, double-click the marker icon, then give it a duration.

Once you create a marker press – / [forward slash] – this selects the marker name in the Marker panel so you can quickly rename the marker. If the Marker panel is not open, press – / – twice.

EXTRA CREDIT

The default marker name can be changed in Preferences > Markers & Metadata


Please rate the helpfulness of this tip.

Click on a star to rate it!

… for Adobe Premiere Pro CC

Tip #041: Optimizing Premiere Transition Preferences

Larry Jordan – https://LarryJordan.com

Premiere’s defaults aren’t bad. But they aren’t very good, either.

Tip Screen Shot

Topic $TipTopic

Preferences are exactly that – YOUR preferences on how the software should work. This means that you can set your preferences however you want. But, as a starting point to your own modifications, let me share some of my preferences with you. Use or modify these in whatever ways seem good to you.

Preferences > Timeline

The hidden “gotcha” with the transition settings are that they use frames to determine durations. Which is fine – until your frame rates change. At which point, all these durations need to change as well.

  • Video. I prefer transitional dissolves that last 2/3 of a second; a one-second transition just hangs on screen for too long. However, I also shoot mostly 60 fps material. So I change this to 40 frames (40/60 = 2/3).
  • Audio Transition. Most of the time, I like a 1/4 second fade-up, while for fade-outs, I prefer about one second.  Sadly, Premiere only allows me to pick one so I generally leave this at the default.
  • Still image. Here’s a cool tip. If you are building a still image montage set to music, figure out the duration between beats, then import all your stills to match that duration. This means you can edit stills into the timeline without setting an In or an Out.
  • Timeline Playback Auto-Scrolling. It takes more CPU power, but Smooth Scroll looks nicer. Use Page Scroll on slower systems, as it uses less CPU overhead.
  • Timeline mouse scrolling. Vertical allows you to quickly scroll up in projects that use many stacked clips. Most of my edits are five tracks or less, so I change this to Horizontal, so I can quickly move around the timeline.

Please rate the helpfulness of this tip.

Click on a star to rate it!