… for Visual Effects

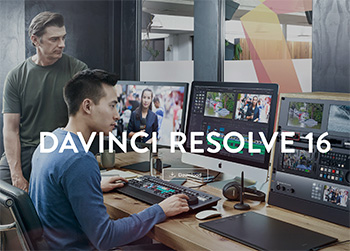
Tip #1087: Get Started with DaVinci Resolve 16

Larry Jordan – LarryJordan.com

Even the free version of Resolve can create useful, high-quality projects.

Promotional image from the DaVinci Resolve website.

Topic $TipTopic

This article first appeared in MotionArray.com. This is a summary.

In recent years, DaVinci Resolve has steadily gained interest from professionals and hobbyists alike. Fueled by a surprisingly capable free version, and the constant addition of new features, the software is now more popular than ever. Not only will you find a complete set of user-friendly video editing tools, but there are also audio mixing and visual effects compositing workspaces!

Whether you are new to video editing or looking to jump ship from other software, this tutorial shows how to use DaVinci Resolve to get up and running fast.

The tutorial linked above covers the basics of editing in Resolve:

  • Step 1: Create a New Project & Import Media
  • Step 2: Add Trimmed Clips to the Timeline
  • Step 3: Add Text & Titles
  • Step 4: Add Transitions
  • Step 5: Add Effects
  • Step 6: Add Music & Audio
  • Step 7: Color Correction
  • Step 8: Share Your Project

Please rate the helpfulness of this tip.

Click on a star to rate it!

… for Visual Effects

Tip #1089: Learning Fusion in DaVinci Resolve

Larry Jordan – LarryJordan.com

Free tutorials from Blackmagic that show how to use Fusion effectively.

(Image courtesy of Pexels.com.)

Topic $TipTopic

Built into DaVinci Resolve is a powerful effects system called Fusion.

Fusion is different from many other effects systems in that it is node-based. This requires a different way of planning and executing an effect.

To help you learn it, Blackmagic Design, the developer of DaVinci Resolve, has created a series of video tutorials that span the basics of editing to creating 3D visual effects in Fusion.

The tutorials are free to watch or download.

Here’s the link to these tutorials.


Please rate the helpfulness of this tip.

Click on a star to rate it!

… for Adobe Premiere Pro CC

Tip #1072: Preserve Your Projects – Long-term

Larry Jordan – LarryJordan.com

XML is the only file format that can be shared between apps.

The File > Export > Final Cut Pro XML dialog in Premiere.

Topic $TipTopic

Some projects are one-and-done. Never to see the light of day again. However, in these days of stock media and multiple versions, we often go back to the same project for years.

Yet, technology marches on. How do we protect our edit for the long-term? There’s only one answer: export an XML of every finished project.

How? File > Export > Final Cut Pro XML.

  • XML files describe every element of your edit – but DON’T include media. (You will need to archive media separately.)
  • XML files can be transferred between applications, native project files can’t.

The best option, always, is to reopen your project in the application that created it. But, when that isn’t possible, XML makes sure you can recover your edit. Media links, edits and transitions are preserved in XML. When moving an XML file to other applications, though, you will lose most effects and color grading settings.

Because XML files are small, take almost no time to export, and provide the greatest amount of flexibility for the future, always export an XML version of the finished timeline when you are done with a project.


Please rate the helpfulness of this tip.

Click on a star to rate it!

… for Apple Final Cut Pro X

Tip #1071: Preserve Your Projects – Long-term

Larry Jordan – LarryJordan.com

XML is the only file format that can be shared between apps.

The File > Export XML dialog. Make sure you are using the latest version of XML.

Topic $TipTopic

Some projects are one-and-done. Never to see the light of day again. However, in these days of stock media and multiple versions, we often go back to the same project for years.

Yet, technology marches on. How do we protect our edit for the long-term? There’s only one answer: export an XML of every finished project.

How? File > Export XML.

  • XML files describe every element of your edit – but DON’T include media. (You will need to archive media separately.)
  • XML files can be transferred between applications, native project files can’t.

The best option, always, is to reopen your project in the application that created it. But, when that isn’t possible, XML makes sure you can recover your edit. Media links, edits and transitions are preserved in XML. When moving an XML file to other applications, though, you will lose most effects and color grade settings.

Because XML files are small, take almost no time to export, and provide the greatest amount of flexibility for the future, always export an XML version of the finished timeline when you are done with a project.

NOTE: Make sure you always export using the latest version of XML supported by Final Cut Pro X.


Please rate the helpfulness of this tip.

Click on a star to rate it!

… for Random Weirdness

Tip #1062: Accusonus Releases ERA 5

Larry Jordan – LarryJordan.com

Easy-to-use, high-power audio tools for all NLEs.

The Voice AutoEQ interface in the new ERA 5 bundle.

Topic $TipTopic

Accusonus, a well-respected name in audio repair, just released ERA 5.

This bundle “features incredible new tools and the biggest engine update yet, delivering staggering quality with the most intuitive workflow for creators. Innovative solutions empower you to fix even more audio issues than before, saving time in editing and enhancing your sound.” (Accusonus blog)

New tools include:

  • Voice AutoEQ. This automatically adjust its parameters to provide you with a great baseline of good sounding EQ for the human voice, which you can adjust to taste afterwards.
  • Voice Deepener. This creates a voice recording that is able to allure, convince and hook everyone! Just select the voice deepening amount that sounds right to you and let it do its magic.
  • Audio Cleanup Assistant. This features presets for podcasting, vlogging, interviews, audiobooks and all sorts of content creation. And if you often have to deal with audio that has been recorded in the same conditions again and again, you can always save and recall your own presets.
  • Noise Remover Pro. RA Noise Remover Pro has up to 6 spectral processing bands. By applying a different amount of processing to each band, you can further tune the algorithm performance on your particular source material. Save dialogue tracks which cannot be recorded again, remove unwanted elements with astonishing precision, and enjoy the ultimate control over your recordings.
  • Reverb Remover Pro. Ggt tailored reverberation reduction on key frequency ranges. Each band has been fine tuned to work optimally in its range, while the complexity is managed automatically behind the scenes. Reverb reduction is one of the most demanding post production processes.

And several more. The software is available by subscription.

Download a free trial here.

EXTRA CREDIT

They don’t promote it, but the new De-reverb filter in Adobe Premiere is actually technology licensed from Accusonus.


Please rate the helpfulness of this tip.

Click on a star to rate it!

… for Apple Motion

Tip #1059: Animate a Line

Larry Jordan – LarryJordan.com

Write on animates borders attached to lines, paths and paint strokes.

The Draw and Erase setting applied to a path using the Write On behavior.

Topic $TipTopic

This is a fun and fast way to animate any path, line or paint brush in Motion using the Write On behavior. Even better, you can animate a line to draw, erase, or draw then erase itself. Here’s how this works:

  • Using the Pen or Paint Brush tool, draw a path in Motion.
  • With the path selected, choose a border from the HUD (Option + Cmd + L) or Inspector > Object. The border needs a width greater than 0.

NOTE: Personally, I prefer applying Shape Styles, but these, too, need a wider border value.

  • With the path element still selected in the Layers panel, choose Behaviors > Shape > Write On. This animates the border starting at the beginning of the path.
  • Adjust the Offset value to change where drawing the border starts.

This technique is great at creating animated travel lines for a map, or calling attention to a moving object.

EXTRA CREDIT

  • Change the duration of the Write on behavior to change it’s speed.
  • Select the Write on behavior, then, in Inspector > Behaviors, change the menu from Draw to Erase. This animates the removal of the border, Or Draw and Erase, which draws it on, then draws it off.

Please rate the helpfulness of this tip.

Click on a star to rate it!

… for Adobe Premiere Pro CC

Tip #1056: Move a Mix from Audition to Premiere

Larry Jordan – LarryJordan.com

Take the time to verify the technical quality of your mix using Amplitude Statistics.

The four key fields I check for every exported WAV file.

Topic $TipTopic

Recently, when I was preparing my webinar An Overview of Adobe Audition, I was reminded of an important tip I learned a while ago.

When sending an audio mix from Audition back to Premiere, don’t use Multitrack > Export to Adobe Premiere. Why? Because you don’t know what you are getting. There’s a better way.

Instead, choose File > Export > Multitrack Mixdown > Entire Session.

This displays a window where you can set various parameters for your exported mix. In general, for video, choose:

  • WAV
  • 48K sample rate
  • 16-bit depth
  • Stereo
  • Check Open files after export

When the mix is complete, the exported file will be displayed in the Files panel. Double-click it to open it the Waveform Editor. This next step is the reason for this whole process: choose Window > Amplitude Statistics and click Scan in the lower left corner of the window.

This analyzes your clip for a variety of technical parameters. Here are the four fields I ALWAYS check:

  • True Peak. This is the loudest level in your mix. This must be below 0.
  • Possibly clipped samples. This must be 0. Anything larger means you have distortion in your mix.
  • DC Offset. This should be at or very close to 0
  • LUFS. This measures the average level of the total mix.

For broadcast, digital cinema and cable, LUFS should be -24 ±1. For the web, LUFS should be around -16. (LUFS is also referred to as LKFS.)

Once I verify that my audio meets all technical specs, I import it into Premiere and add it to the timeline as the final mix. The benefit to this approach is that I KNOW my audio is good, before final output, rather than HOPING it is good.

EXTRA CREDIT

Here’s a video that shows this process in operation.


Please rate the helpfulness of this tip.

Click on a star to rate it!

… for Apple Final Cut Pro X

Tip #1055: Create a Small Movie – Fast!

Larry Jordan – LarryJordan.com

A Master File does not necessarily mean high-quality. Actually, you get to pick.

Choose File > Share > Master File, then pick H.264 or ProRes Proxy.

Topic $TipTopic

Here’s a fast way to create a small file you can use for client reviews, audio mixing or wherever image quality is less important than small file size.

When you need a small file, quickly, here are the steps:

  • Select the project in the Browser or open it in the Timeline to make it active.
  • Choose File > Share > Master File.
  • Then, from the Video Codec menu pick H.264.

This quickly creates a very small, high-quality file because H.264 compression is hardware-accelerated on virtually all Macs.

EXTRA CREDIT

Unlike proxy files, this movie will match the frame size and frame rate of your project.


Please rate the helpfulness of this tip.

Click on a star to rate it!

… for Visual Effects

Tip #1051: 6 Mocha Pro Tutorials

Larry Jordan – LarryJordan.com

Six video tutorials to improve your motion tracking results.

The Mocha Pro logo.

Topic $TipTopic

The team at ToolFarm, a leading third-party reseller of After Effects plugins and visual effects tools, published a blog showcasing video tutorials to improve working with Mocha Pro. Here’s a summary.

NOTE: Here’s the link to all the tutorials.

Mocha Pro, published by BorisFX, works as a standalone app or plug-in for several hosts and works pretty much the same between hosts, so if you see a tutorial for a software that you don’t use, know that it will translate easily to your host.

The tutorials, all presented by Mary Poplin, include:

  1. Mocha Keyboard Shortcuts
  2. Shape-Based Tracking
  3. More Shape-Tracking Tricks & Tips
  4. Advanced Tracking in Adobe After Effects
  5. How to Avoid Reflections & Shadows
  6. How to Correct Tracking Drift

Please rate the helpfulness of this tip.

Click on a star to rate it!

… for Visual Effects

Tip #1053: 50 Ways to Create Different Effects

Larry Jordan – LarryJordan.com

50 tutorials to create specific effects in After Effects.

(Image courtesy of Pexels.com.)

Topic $TipTopic

This list, written by Nousheen Aquil, first appeared in JotForm Blog.

This post presents a round-up of Adobe After Effects video tutorials for visual effects and motion graphics-related work. After Effects continues to grow in popularity for motion graphics. With After Effects, you have many choices in how to generate dynamic and expressive motion graphics with truly stunning visual effects — very easily and quickly.

What makes this list different is that, rather than show tools, these tutorials show how to create specific effects.

I won’t list all 50 here – rather click the link above and watch the ones of interest to you.


Please rate the helpfulness of this tip.

Click on a star to rate it!