… for Visual Effects

Tip #936: 10 Must-Know After Effects Shortcuts

Larry Jordan – LarryJordan.com

These ten shortcuts are essential for any After Effects user.

Topic $TipTopic

This article, written by Joe Frederick, first appeared in PremiumBeat.com. This is an excerpt.

These simple key combinations let you perform commands that you’d typically execute with your mouse, and while they may only save you a few seconds each time you use them, those saved seconds will add up to saved hours over the duration of a project. Here are the 10 keyboard shortcuts you should learn first.

  1. Activate Selection Tool: V
  2. Activate Hand Tool: H
  3. Reveal All Keyframed Properties: U
  4. Precompose Selected Layers: Ctrl + Shift + C
  5. Show/Hide Opacity: T
  6. Fit to Screen: Shift + /
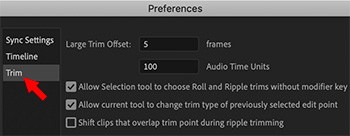
  7. Split Layer: Cmd + Shift + D
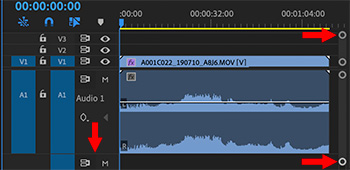
  8. Trim Layer Out Point to Current Time: Option + ]
  9. Go Back/Forward One Frame: Command + Right/Left Arrow
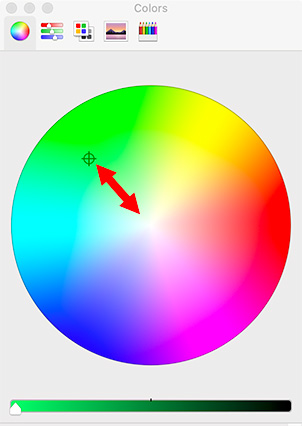
  10. Stretch Keyframes: Option + Mouse Drag

EXTRA CREDIT

The article has illustrations for each shortcut, as well as a detailed description of how and when to use it.


Please rate the helpfulness of this tip.

Click on a star to rate it!

… for Adobe Premiere Pro CC

Tip #931: What is a Project Shortcut?

Larry Jordan – LarryJordan.com

Project shortcuts allow you to import projects as separate project panels.

The Import Project dialog. Premiere seems to ignore the bottom checkbox.

Topic $TipTopic

Something new appeared in the File menu in the spring of 2020: a Project Shortcut. What is this?

Starting with Premiere Pro 14.1, Shared Projects have been renamed as Project Shortcuts. Project Shortcuts are quick links to open other projects. You can import projects as project shortcuts.

To import projects as project shortcuts:

  • Click File > Import and select the project file that you want to import.
  • In the Import Project dialog box, select Import as Project Shortcut and click OK.

The project is imported and can be seen in the Project panel as a folder icon with an icon indicating that it is a link to the project.

Double-click this link to open a new Project panel for that imported project.

You can make this the default option for all imported projects by checking the “Do the same for all projects” checkbox at the bottom. But, even when you check this, the Project Import dialog will appear each time you open a new project. So, I’m not sure what good checking this box does.

EXTRA CREDIT

If you have shared projects from older versions of Premiere Pro, continue to work with them using Project Shortcuts. If you are collaborating on new projects with others, consider trying the Production workflow.


Please rate the helpfulness of this tip.

Click on a star to rate it!

… for Adobe Premiere Pro CC

Tip #893: Timeline Mouse Shortcuts

Larry Jordan – LarryJordan.com

Changing timeline track heights is easily done using the mouse or keyboard.

Drag the circles on the right to change video (top) and audio (bottom) track heights.

Topic $TipTopic

One of the problems of being a keyboard shortcut junkie is that I can easily overlook interesting mouse shortcuts. Here’s one; well, two, actually.

  • To change the height of a timeline track, drag the horizontal line that separates two tracks (the left arrow in the screen shot).
  • But is it easier to see and drag one of the white circles on the right side of the timeline. The upper circle changes the video track height, the lower circle changes the audio track height.
  • Drag the space between the two circles in the middle to change where the division between audio and video occurs in the timeline.

EXTRA CREDIT

Just so keyboard folks are not left out:

  • You can change the height of video tracks in the timeline by typing Cmd + [plus] / [minus]

NOTE: Control, for you Windows folks.

  • You can change the height of audio tracks in the timeline by typing Option + [plus] / [minus]

NOTE: Alt, for you Windows folks.


Please rate the helpfulness of this tip.

Click on a star to rate it!

… for Apple Final Cut Pro X

Tip #816: A Baker’s Dozen Better Shortcuts

Larry Jordan – LarryJordan.com

If I were to pick my favorite shortcuts, these are probably it.

Topic $TipTopic

When you start doing the same tasks over and over, keyboard shortcuts can make you more efficient. Here are the keyboard shortcuts I use everyday when editing in Final Cut:

  • Control + Cmd + 1 — Toggle Library and Browser display on/off.
  • Cmd + 4 — Toggle the Inspector open or closed
  • Shift + Z — Fit image into Viewer or project into Timeline.
  • Cmd + 7 — Show/Hide video scopes.
  • Shift + I / O — Jump the playhead to the In / Out.
  • Option + X — Delete both the marked In and Out.
  • V — Toggle clip visibility off or on.
  • E — Perform a standard append edit into the Primary Storyline at the end of the timeline.
  • W — Perform a standard insert edit at the position of the skimmer/playhead.
  • D — Perform an overwrite edit into the Primary Storyline at the position of the playhead.
  • Option + W — Insert a gap into the Timeline at the position of the skimmer/playhead.
  • Cmd + B — Cut all selected clip(s) at the position of the skimmer/playhead.

BONUS

  • Shift + comma/period — Move selected edit point or connected clip ten frames left/right.
  • S — Toggle skimming on or off.
  • F — Flag a clip or clip range as a Favorite.

Please rate the helpfulness of this tip.

Click on a star to rate it!

… for Adobe Premiere Pro CC

Tip #772: A Preference for Faster Trimming

Larry Jordan – LarryJordan.com

These preference settings are off by default.

Trim preference settings in Premiere. Check the top box.

Topic $TipTopic

There is a trimming preference setting that can speed trimming your clips. However, it is off by default. Here’s what you need to know to turn this on.

Open Preferences > Trim and check the top box.

  • Allow Selection tool… This changes the cursor to the Ripple or Roll trimming tools depending upon where it is located relative to the edit point.

For example, hover the cursor near the Out and the cursor changes to a Ripple trim. Hover it over the edit point, and it automatically changes to a Roll trim. Near the In switches to the Ripple tool again.

When this option is not checked, hovering over an edit point displays the Trim In/Out tool, which is less helpful than Ripple and Roll.


Please rate the helpfulness of this tip.

Click on a star to rate it!

… for Apple Final Cut Pro X

Tip #698: Playback Shortcuts

Larry Jordan – LarryJordan.com

7 shortcuts that simplify preview and playback.

The View > Playback menu.

Topic $TipTopic

Hiding in plain sight are seven shortcuts that can making previewing and playing your projects a lot easier.

These shortcuts are located in the View > Playback menu – and, I’ll bet, you looked at these once then immediately forgot about them.

Shortcut What It Does
space Plays from the position of the playhead
/ Plays selection
Shift + ? Backs up the Preroll duration and plays until reaching the postroll duration.
Shift + Option + I Plays from the beginning of the browser clip or timeline
Shift + Option + O Plays from curent playhead position to the end
Shift + Cmd + F Plays the timeline full-screen
Cmd + L Loops timeline playback

NOTE: Preroll and Post-roll durations are set in Preferences > Playback.


Please rate the helpfulness of this tip.

Click on a star to rate it!

… for Visual Effects

Tip #607: Autodesk Flame & Smoke Shortcuts

Larry Jordan – LarryJordan.com

A searchable list of Flame and Smoke Classic Shortcuts

The Flame logo.

Topic $TipTopic

Autodesk published a searchable list of keyboard shortcuts for both Flame and Smoke, organized by function.

You can find them here.


Please rate the helpfulness of this tip.

Click on a star to rate it!

… for Adobe Premiere Pro CC

Tip #602: Premiere: Color Wheel Secret Tip

Larry Jordan – LarryJordan.com

Lock the hue while varying the saturation.

Here’s a secret tip when working with the macOS Colors window to choose a color.

Topic $TipTopic

Here’s a secret tip when working with the macOS Colors window to choose a color.

Drag the small puck in the color wheel to choose a color, then press the Shift key.

This constrains the movement of the puck so that it moves in a straight line between its current position and the center.

This allows you to lock the hue while changing the saturation.


Please rate the helpfulness of this tip.

Click on a star to rate it!

… for Apple Final Cut Pro X

Tip #601: FCP X: Color Wheel Secret

Larry Jordan – LarryJordan.com

Lock the hue while varying the saturation.

Press and hold the Shift key while dragging to constrain the hue.

Topic $TipTopic

Here’s a secret tip when working with the macOS Colors window to choose a color.

Drag the small puck in the color wheel to choose a color, then press the Shift key.

This constrains the movement of the puck so that it moves in a straight line between its current position and the center.

This allows you to lock the hue while changing the saturation.


Please rate the helpfulness of this tip.

Click on a star to rate it!

… for Apple Motion

Tip #571: Useful Motion Keyboard Shortcuts

Larry Jordan – LarryJordan.com

300+ shortcuts organized and ready for you.

Topic $TipTopic

The folks at ShortCutWorld.com have compiled a list of 300+ keyboard shortcuts for Apple Motion and grouped them into 29 categories!

This is the most extensive list of shortcuts for Motion that I’ve seen in a long while.

Here’s the link.


Please rate the helpfulness of this tip.

Click on a star to rate it!