… for Apple Final Cut Pro X

Tip #267: Improving Green-screen keys

Larry Jordan – LarryJordan.com

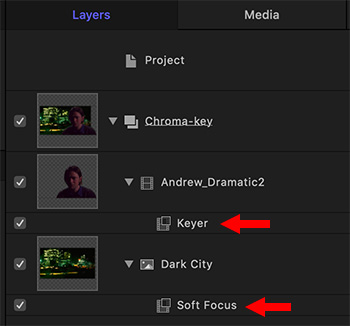
The Keyer is good – this can make it better.

The Keyer green-screen effect in Final Cut Pro X.
Shades of gray in the keyed image create very poor keys. Aim for pure black & white.

Topic $TipTopic

Explaining how to use the Keyer effect in Final Cut is more than a tip, it’s an entire article. But, here are three things to keep in mind when you use it.

Normally, when you add the Keyer effect to a key, it correctly guesses what background color it needs to remove. In fact, this filter is pretty darn good at keying.

But, for those situations where the lighting is poor, or the background color is not well saturated, display the effect in the Video Inspector and go down to Color Selection.

  • Set the Graph to Manual.
  • Then, tweak the colors so that which you want to see (i.e. the foreground) is solid white, without any shades of gray. White means an object is fully opaque.
  • Next, tweak the background so it is solid black. Black means a background is fully transparent. (In all cases, shades of gray are to be avoided at all costs.)
  • Finally, to blend colors from the background into the edges of the foreground image, go down to Light Wrap and increase Amount to between 10 – 20%. This blends colors between the two layers to make them look more organically blended.

Please rate the helpfulness of this tip.

Click on a star to rate it!

… for Random Weirdness

Tip #165: Turn Old Phones Into Wireless Mics

Larry Jordan – LarryJordan.com

A cool way to repurpose older technology.

Topic $TipTopic

Eric Escobar wrote about this in The Beat:

While old phones don’t work well as multifunctional smart phones anymore, they are capable of doing some amazing things. For example, recording high-quality, high bit-rate audio. With the right microphone attachment, an old iPhone becomes a wireless portable audio source with built-in power and storage.

For example, pair an inexpensive used Movo PM10 lavalier-style mics as a body mic for on camera talent. A setup that’s great for capturing on-set audio for very little money.

Keep in mind that using an older iPhone means that you give up real-time audio monitoring. For some, that’s a deal-breaker. For others, the savings in dollars makes the risk worthwhile. The basic trade-off is inexpensive gear vs. not knowing what you’ve got until after the recording stops.

For recording software, Eric recommends the free TASCAM PCM Recorder. It records 44.1khz audio at 16 bits right off the built-in mic or any external mic plugged into the headphone jack. It is a “two button” operation, meaning you have to click the red record button first, then the green play button to get it to “roll” just like an old DAT recorder. That may be anachronistic, which is fine. There are literally a dozen other free-to-cheap apps that will let you record audio on your phone at 48khz in 16-bit. Find the one that matches your style.

NOTE: Remember, video records audio at a 48k sample rate. It is best to match external audio recorders to that sample rate.

He has more recommendations. Click the link above to read the whole article.


Please rate the helpfulness of this tip.

Click on a star to rate it!

… for Random Weirdness

Tip #157: See Which Apps Use More Memory

Larry Jordan – LarryJordan.com

How much RAM do you REALLY use – or need?

Topic $TipTopic

Hidden in Applications > Utilities is a powerful measurement tool called: Activity Monitor.

  • Type Shift + Cmd + U to open the Utilities folder. Double-click Activity Monitor to start the app.

Activity Monitor allows us to measure current activity in five key areas:

  • CPU
  • Memory (RAM)
  • Energy
  • Disk (local storage)
  • Network (both Internet and other network-connected devices)

Click the Memory tab at the top to display all the currently-running applications and the amount of memory each is using.

The key section is at the bottom.

The Memory Pressure graph helps illustrate the availability of memory resources. The graph moves from right to left and updates at the intervals set in View > Update Frequency. The current state of memory resources is indicated by the color at the right side of the graph:

  • Green: Memory resources are available.
  • Yellow: Memory resources are still available but are being tasked by memory-management processes, such as compression.
  • Red: Memory resources are depleted, and macOS is using your startup drive for memory. To make more RAM available, you can quit one or more apps or install more RAM. This is the most important indicator that your Mac may need more RAM.

Here are definitions of the other statistics:

  • Physical memory. The amount of RAM currently installed in your system.
  • Memory used. The amount of RAM currently in use.
  • Cached files. Memory that was recently used by apps and is now available for use by other apps. For example, if you’ve been using Mail and then quit Mail, the RAM that Mail was using becomes part of the memory used by cached files, which then becomes available to other apps. If you open Mail again before its cached-files memory is used (overwritten) by another app, Mail opens more quickly because that memory is quickly converted back to app memory without having to load its contents from your startup drive.
  • Swap Used. The space used on your startup drive by macOS memory management. It’s normal to see some activity here. As long as memory pressure is not in the red state, macOS has memory resources available.

Your goal is to have as little red in the graph or Swap as possible. Why? Because while RAM is very fast, swapping files to the hard disk (even an SSD) is very slow and degrades the performance of your system.

If Swap is always a large number, your performance may benefit from using a system with more RAM.

BONUS

Here’s what these three additional categories mean:

  • App Memory. The total amount of memory currently used by apps and their processes.
  • Wired Memory. Wired memory is the part where the OS Kernel and other low level components, as drivers and virtual memory objects are stored. Specifically, information in RAM that can’t be moved to the Mac’s drive. The amount of Wired memory depends on the applications you are using.
  • Compressed. The amount of memory in RAM that is compressed to make more RAM memory available to other processes. This is the last step before swapping RAM out to local storage.

Please rate the helpfulness of this tip.

Click on a star to rate it!

… for Random Weirdness

Tip #156: Measure CPU Performance on Your Mac

Larry Jordan – LarryJordan.com

Activity Monitor displays how hard your CPU is working.

Topic $TipTopic

Hidden in Applications > Utilities is a powerful measurement tool called: Activity Monitor.

  • Type Shift + Cmd + U to open the Utilities folder. Double-click Activity Monitor to start the app.

Activity Monitor allows us to measure current activity in five key areas:

  • CPU
  • Memory (RAM)
  • Energy
  • Disk (local storage)
  • Network (both Internet and other network-connected devices)

Click the CPU tab at the top to display all the software currently running on your system. You won’t recognize most of these, because many of the programs your Mac runs are background tasks.

The graph at the bottom (see the screen shot) shows total CPU effort called “CPU Load.” Red indicates tasks running under the control of the operating system. Blue shows tasks that you have started. The maximum CPU % is based on the number of cores in your computer times 100. So a four-core system has a maximum of 400% CPU activity.

I often look at this to see what my CPUs are doing and how hard they are working. This also allows me to cancel any non-critical tasks that are using up too much CPU time.

BONUS

You can also see CPU usage or history in a separate window or in the Dock:

  • To open a window showing current processor activity, choose Window > CPU Usage. To show a graph of this information in your Dock, choose View > Dock Icon > Show CPU Usage.
  • To open a window showing recent processor activity, choose Window > CPU History. To show a graph of this information in your Dock, choose View > Dock Icon > Show CPU History.

Energy usage related to CPU activity is incorporated into the energy-impact measurements in the Energy tab of Activity Monitor.


Please rate the helpfulness of this tip.

Click on a star to rate it!

… for Adobe Premiere Pro CC

Tip #252: What’s the Reference Monitor?

Larry Jordan – LarryJordan.com

A free-floating monitor with many purposes.

The Reference Monitor in Adobe Premiere Pro CC.
The Reference Monitor floats above the Program Monitor.

Topic $TipTopic

The reference monitor acts like a secondary Program Monitor. You can use it to compare different frames from the same sequence side-by-side, display video scopes, display different text overlays, or view the same frame using different viewing modes.

To open the reference monitor, choose Window > Reference Monitor.

To “gang” (which means to connect) the reference monitor to the program monitor, click the Wrench icon in the lower right-corner of the reference monitor and pick the top option: Gang to Program Monitor.

If the monitors are not ganged, you can drag the playhead to different frames in each monitor for comparison.

EXTRA CREDIT

Click the Wrench icon in the reference monitor to see a variety of other display options.


Please rate the helpfulness of this tip.

Click on a star to rate it!

… for Adobe Premiere Pro CC

Tip #251: Change the Sequence Starting Timecode

Larry Jordan – LarryJordan.com

New options allow you to set a timecode default.

The Start Time dialog in Premiere Pro CC
Click the “thumb” to the right of the sequence name in Timeline to set timecode.

Topic $TipTopic

Timecode is a label for every frame of video in a clip, or the sequence itself. It’s composed of four pairs of numbers representing HOURS:MINUTES:SECONDS:FRAMES. Every frame in a clip has a unique timecode associated with it.

Think of timecode as the address of a house, it allows us to quickly find any frame in a clip. (Timecode can match between clips, in which case, an NLE can tell which frame is in which clip by combining the timecode with the clip name and its path.)

NOTE: For those who need to deal with drop-frame vs. non-drop-frame, the difference is the last colon. If the last symbol is a colon (:), the clip is non-drop-frame. If the last symbol is a semi-colon (;), the clip is drop-frame.

By default, the starting timecode for a sequence is 00:00:00:00. However, there are times when you need to change it; for example, sequences destined for broadcast.

To change the starting timecode:

  • Click the 3-line “stacked pancakes” immediately to the right of the sequence name in the Timeline.
  • Enter the starting timecode for the sequence.
  • Check Set as default for future sequences if you want to make this the default setting.
  • Check Set by first clip if you want the sequence to inherit the timecode of the first clip you edit into the sequence.

EXTRA CREDIT

While it’s possible for timecode to match time of day, most of the time it does not. Don’t get confused. Timecode is a label expressed as time, not a time-of-day reference.


Please rate the helpfulness of this tip.

Click on a star to rate it!

… for Adobe Premiere Pro CC

Tip #237: Prevent Accidents – Lock It Down

Larry Jordan – LarryJordan.com

Track locks are specific to each track.

Track locks in Adobe Premiere Pro CC
Blue locks are locked, white locks are unlocked.

Topic $TipTopic

Have you ever had that sinking feeling that you just destroyed an edit because you deleted/moved/adjusted something you shouldn’t? Yeah, me, too. Here’s how to prevent it.

Minimize the chance for errors by locking your tracks.

  • Click the Track Lock icon – yup, it looks like a lock. Blue locks are locked, white locks are unlocked. The default is unlocked.
  • Shift – click to lock all audio or all video tracks.
  • To work on one track and lock all others, Shift – click any lock to lock all tracks, then click the lock for the one track you want to adjust.

NOTE: When a track is locked, diagonal hash lines appear on the track.

EXTRA CREDIT

These locks are not for security, you can’t password-protect them. Rather, they are to help prevent mistakes.

Also, keep in mind that if you lock a video track, for example, you are still able to move its audio track, which would knock it out of sync.


Please rate the helpfulness of this tip.

Click on a star to rate it!

… for Apple Motion

Tip #204: Fill an Element with a Gradient or Color

Larry Jordan – LarryJordan.com

This technique can be used for elements or groups.

On-screen gradient controls in the Motion Viewer.
Adjust the colors and direction for a gradient using the on-screen Viewer controls.

Topic $TipTopic

This technique allows you to quickly fill an element or all the elements in a group with a gradient or color, the only difference is whether you first select an element or a group.

  • Select an element.
  • Choose Library > Filters > Stylize > Fill
  • Go to Inspector > Filters and select a color or gradient.
  • If you choose a gradient, use the controls in the Viewer to change the direction.

Done.


Please rate the helpfulness of this tip.

Click on a star to rate it!

… for Apple Motion

Tip #203: Create Split Screen Animation – Fast

Larry Jordan – LarryJordan.com

Use Motion to speed creating animated split screens.

Three drop-zone placeholders in the Motion Viewer.
Size and animate the drop-zones in the Motion Viewer.

Topic $TipTopic

This technique uses Apple Motion to create an animated split screen template for Final Cut Pro X. If you only need to create split screens once, use Final Cut. If you need to create split screens more than once, it is much easier to create them as a template in Motion. Here’s how.

  • Create a new Generator in Motion. (Set the duration to a few seconds longer than necessary to allow room for transition handles.)
  • Choose Object > New Drop Zone. This adds an image placeholder that you will fill in Final Cut.
  • Size and position the Drop Zone as needed.
  • Add as many different Drop Zones as you have images.
  • To animate, select each layer and apply a Behavior. A good one to experiment with is Throw. Adjust using the HUD.
  • Choose File > Save. Give this new template a name and Category (folder).

Now, when you open Final Cut and go to the Generator browser, you’ll find this new template ready to go. Add images into the drop zones the same as any other Final Cut effect.

EXTRA CREDIT

Each drop zone can have filters applied, as well as much more extensive animation.

Normally, I put this effect over a background created in Final Cut. However, you can add the background in Motion and it will automatically transfer to Final Cut.

Additionally, you can add other elements such as lines, drawings… whatever sparks your imagination.


Please rate the helpfulness of this tip.

Click on a star to rate it!

… for Apple Motion

Tip #190: Fast Green-Screen Keys in Motion

Larry Jordan – LarryJordan.com

Four steps to better-looking keys.

Green-screen foreground goes above the background.
Apply the Keyer filter to the foreground and Soft Focus to the background.

Topic $TipTopic

The chroma-key filter, also called a “green-screen key,” in Motion and Final Cut Pro X is excellent at creating a clean key, generally without needing to touch any settings.

Here’s how.

  • Import the foreground shot that has the green background. (The smoother and brighter this background is lit, the better your key. Remember, we are replacing all the green pixels.)
  • Import the new background shot you want to use in place of the original green and place it below the green-screen shot.
  • Apply Filters > Keying > Keyer to the foreground clip.
  • Apply Filters > Blur > Soft Focus to the background clip. Adjust the Amount setting so that you create the illusion of depth-of-field in the shot.

EXTRA CREDIT

Generally, to make a key look really believable, you’ll also need to add some color correction to the foreground. But, in terms of creating the key, these are the steps you need to know.


Please rate the helpfulness of this tip.

Click on a star to rate it!