… for Apple Motion

Tip #963: Apple Updates Motion

Larry Jordan – LarryJordan.com

Apple updates Motion to support 3D shapes and a faster way to creates borders.

The 3D Transform tool adjusting on of the new 3D models in Motion 5.4.9.

Topic $TipTopic

Last week, Apple continued the evolutionary growth of Motion – to version 5.4.6 – along with updates for Final Cut Pro X and Compressor. While none of these features are revolutionary, all are useful and include:

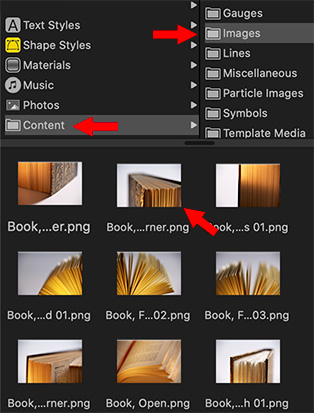
  • Support for 3D models, along with 60 new 3D models in the Motion Library
  • Importing 3D models in the USDZ format.
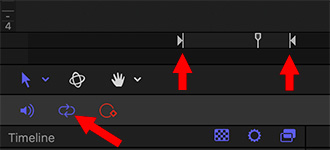
  • A new Stroke filter which quickly outlines objects using an associated alpha channel

These free updates are accessed through the Mac App Store.

EXTRA CREDIT

The 5.4.4 release of Motion also included:

  • Metal-based processing engine to improve playback, rendering, and compositing.
  • Creating 8K motion graphics by harnessing the power of multiple GPUs, up to 28 CPU cores, and Afterburner with Mac Pro (2019).
  • Ability to view stunning HDR titles and effects with Apple Pro Display XDR.

Here’s a link to learn more.


Please rate the helpfulness of this tip.

Click on a star to rate it!

… for Codecs & Media

Tip #964: Apple Updates Compressor

Larry Jordan – LarryJordan.com

Better LUT support is the key feature in this release.

New media conversion options in Apple Compressor.

Topic $TipTopic

Last week, Apple continued the evolutionary growth of Compressor – to version 4.4.7 – along with updates for Motion and Compressor. While none of these features are revolutionary, all are useful and include:

  • Camera Log Conversion. You can now convert from log to SDR or HDR color spaces by apply custom camera LUTs, or using built-in LUTs for Panasonic, Sony, Canon, Blackmagic, Nikon or ARRI log formats.
  • Custom LUT effects. These allow applying third-party creative LUTs to clips for adding a custom look during compression. Compressor supports LUTs in .cube, .mga, and med file formats.

Both of these new features are especially helpful for on-set DIT work, converting camera masters into something more visually pleasing for initial review and rough editing.

NOTE: LUTs applied to media being transcoded are permanently attached to the media.

Compressor 4.4.7 also includes:

  • Improved speed and reliability using distributed processing over SMB.
  • Create ProRes IMF Packages including support for multiple languages.
  • Support for playback of PNG movie files.
  • Fixes an issue in which droplets would not recognize .m4v files.
  • Fixes an issue where a DV codec with a 709 Color Profile fails to transcode.
  • Fixes an issue in which image sequences may export with the incorrect color bit depth.
  • Fixes an issue where a system could run out of memory when the Active tab is open while processing a batch on a MacBook Pro with Touch Bar

These free updates are accessed through the Mac App Store.

EXTRA CREDIT

Here’s a link to learn more.


Please rate the helpfulness of this tip.

Click on a star to rate it!

… for Adobe Premiere Pro CC

Tip #971: A Secret Tip to Moving Markers

Larry Jordan – LarryJordan.com

Including sequence markers means all your marker data travels with your clips.

The Markers menu, showing Copy Paste Includes Sequence Markers (I removed the middle section.)

Topic $TipTopic

There’s a feature in Premiere that’s turned off by default that you might want to enable if you use markers a lot. Here’s what it does.

At the bottom of the Markers menu is a choice that is disabled by default: Copy Paste Includes Sequence Markers.

If you are someone who adds lots of markers to your sequence, or uses marker names, colors or descriptions, you probably noticed that when you copy a clip from one sequence to another all that timeline marker information is lost when you paste. Sigh…

NOTE: This is not true if the markers are in the clips themselves; clip markers always travel with a clip.

However, when you turn this setting on, whenever you select timeline clips that have timeline markers above them, the markers will copy and paste as well as the clips.

Cool!


Please rate the helpfulness of this tip.

Click on a star to rate it!

… for Adobe Premiere Pro CC

Tip #972: A Second Secret Marker Tip

Larry Jordan – LarryJordan.com

Unchecking this option locks timeline markers in place, regardless what you do with your clips.

The Ripple Sequence Markers menu option. (I removed the middle of this menu.)

Topic $TipTopic

There’s another marker secret hidden in plain sight in the Markers menu.

Ripple Sequence Markers, which is on by default, means that when you delete a clip, insert a clip, close a gap or trim a clip, if there are timeline markers above the clip you just changed, the markers will be adjusted as well.

In early versions of Premiere, timeline markers were locked into position, regardless of what you did with your clips.

Now, if you find your markers changing position when you don’t want them to, go to the Markers menu and uncheck this option.


Please rate the helpfulness of this tip.

Click on a star to rate it!

… for Apple Final Cut Pro X

Tip #944: Change Library Storage Locations

Larry Jordan – LarryJordan.com

This option organizes your media, while still keeping it external.

The Storage Locations panel, which is part of Library Properties.

Topic $TipTopic

By default, Final Cut Pro X either stores media in the library file, or points to its current storage location somewhere else on your system. But… there’s a third option that may make more sense for your project.

  • Select a Library in the Library List.
  • In the Inspector, click Modify Settings for Storage Locations.
  • Use the Media pop-up menu (see screen shot), to create a new, external, folder to store all files imported into this project.

Files from other locations will be copied into this location.

The benefits to using a custom library folder are:

  • Media is still stored outside the library; making it accessible to other projects and applications
  • Media is stored in one place, which makes moving libraries, backups, and archives a LOT easier.
  • Each Library can have its own custom folder, which simplifies organizing media by project.
  • It is still easy to share the same media between projects.

EXTRA CREDIT

The only downside to this option is that media is copied into this folder, which may increase total storage requirements.


Please rate the helpfulness of this tip.

Click on a star to rate it!

… for Apple Final Cut Pro X

Tip #946: Organize Custom Motion Projects

Larry Jordan – LarryJordan.com

One choice simplifies access. The other simplifies backups and archiving.

Storage Locations panel displaying Motion content storage options.

Topic $TipTopic

By default, when you create or customize any Final Cut Pro effects, transitions, titles, or generators in Motion, that content is stored in the Motion Templates folder located in your Movies folder. You can also store Motion content inside a library—for example, to move a project or library to another Mac, or to back up and archive your work. You may also want to store Motion content in the library if you’re working on a project with others and using shared storage.

If you have custom Motion content and you’re copying or moving clips, projects, or events to another library, storage device, or Mac, set the storage location for your Motion content to the library before doing so. Otherwise, the Motion content is not moved or copied with the other items, and you must manually back up and move the Motion Templates folder. Regardless, you must manually track and move any third-party (FxPlug) content, because it is not managed within the Final Cut Pro library.

EXTRA CREDIT

Storing Motion projects in the Motion Template folder means they are accessible to all Final Cut libraries.

Storing Motion projects in the library simplifies backups and archiving, but means those custom projects are not available for other libraries.

Motion projects that ship with Final Cut – that is, those you did not create yourself – are available to all libraries and can’t be moved into the library file itself.


Please rate the helpfulness of this tip.

Click on a star to rate it!

… for Random Weirdness

Tip #924: Dropbox Simplifies File Transfers

Larry Jordan – LarryJordan.com

This new features solves problems getting files from Point B to Point A.

The Request Files page inside Dropbox.

Topic $TipTopic

Warren “ButchNelson suggested this tip.

There’s a new feature in Dropbox called “Request a file.” This is a link you can send to anyone and they can upload a file of almost any size; up to the limits of your Dropbox plan.

The file appears in the Request a File folder.

I’ve used this feature this week to collect files from iPhones, Android phones, Macs and PCs. For someone like me, who deals in files from all different sources, I’m in heaven!

It is amazingly easy to use.

Larry adds: To access this, open the Dropbox app, click File Requests in the sidebar on the left, then the blue Request Files button.

Dropbox displays a dialog asking you to specify a storage location, then emails that need to be contacted.


Please rate the helpfulness of this tip.

Click on a star to rate it!

… for Apple Motion

Tip #934: Working with Regions

Larry Jordan – LarryJordan.com

Moving the In and Out to create a work region simplifies reviewing complex sections of a project.

Loop playback (left arrow) repeats playback between the In (center) and Out (right).

Topic $TipTopic

When you are working on a complicated transition, Motion has a hidden control feature that allows you to focus on just a portion of a project. Here’s how this works.

At the bottom left of the timeline, left red arrow, is a loop icon. When enabled (blue), this tells the playhead to continuously play from the beginning to the end of a project; looping from the end to the beginning.

Well, ah, not the beginning to the end, but the In to the Out. These two icons (center and right red arrows) mark the In and Out of a Motion project.

Drag them to bracket the section you want to concentrate on, then, when you press the spacebar, Motion will continuously loop between those two points until you tell it to stop.

EXTRA CREDIT

  • I. Set the In.
  • O. Set the Out.
  • Option + X. Clear the In and the Out.
  • Control + L: Enable/disable Loop playback.

Please rate the helpfulness of this tip.

Click on a star to rate it!

… for Apple Final Cut Pro X

Tip #925: Create a “Master Clip” for Efficiency

Larry Jordan – LarryJordan.com

Opening a Browser clip in the timeline emulates a Master Clip.

This file was opened in the timeline(left) and then effects were applied (right). (Image courtesy of Anne Gibson.)

Topic $TipTopic

Final Cut Pro X doesn’t actually support Master clips. But, here’s a little-known technique you can use to “create” one – along with significant efficiencies when you use these.

A Master clip is one where, when you change it, all the clips edited from it into the timeline change as well. FCP X does not support those type of clips. However, you CAN change a Browser clip BEFORE you edit portions of it into the timeline and have all those changes – like color correction, scaling or audio channels – travel with the edited portion into the Timeline. This means you can change a clip once, then have all those changes transfer during the edit. But, with the 10.4 update, Apple made creating these clips a whole lot less obvious.

NOTE: Final Cut Pro X used to call this “Open in Timeline.” That language has gone away.

Normally, when you edit clips into the Timeline, you can change that timeline clip’s settings or add effects, without affecting any other iteration of that clip in the timeline.

However, if, instead, you select a Browser clip, then choose Clip > Open, that Browser clip is opened in the Timeline, but NOT edited into it.

This means you can apply settings, effects, color correction or reorganize audio channels specifically to the Browser clip. Then, when you edit a portion of that clip into the timeline, all those modifications travel with it.

To remove the clip from the timeline, open a different project into the timeline, which takes it’s place.

EXTRA CREDIT

If you edit clips from the Browser into the timeline, then, open the clip into the timeline and make changes, any existing edited clips are not affected.


Please rate the helpfulness of this tip.

Click on a star to rate it!

… for Apple Motion

Tip #913: A Quick Way to View Media

Larry Jordan – LarryJordan.com

This should work for any media displayed in the Media tab of the Project pane.

Double-click an image in the Library to view it full size.

Topic $TipTopic

This is something I just discovered today as I was writing tips. There’s a “Quick Look” viewer buried in Apple Motion. Here’s where to find it.

I first found that if you go to Library > Content > Images, then double-click any image, it will open full-size in its own window in Motion. However, no other category in the Library seemed to act the same way.

Then, I wondered if this Quick View would also work for imported media. And the answer is: Yes!

Click the Media tab – to the right of Layers tab in the Project Pane – and double-click any video, audio, still or image. Motion will display at 100% size in its own window.

This is a nice way to see what your media looks like, when you need to see the details.


Please rate the helpfulness of this tip.

Click on a star to rate it!