… for Apple Final Cut Pro X

Tip #1494: How to Use Clip Skimming

Larry Jordan – LarryJordan.com

Clip skimming enables high-speed audio review.

Here the cursor is skimming only the “Space Exterior” audio clip.

Topic $TipTopic

(I discovered this tip while researching a recent PowerUP webinar presenting Audio in Apple Final Cut Pro.)

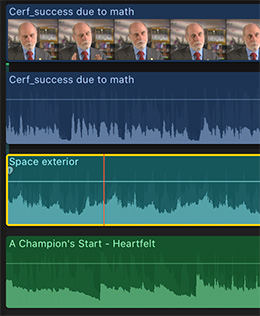
You probably use skimming – the ability to drag the mouse over a clip in the Browser or Timeline to quickly review its contents – when trying to decide which shot to use next. What you may not know is that clip skimming provides even more precise listening in the timeline where many clips are often stacked above or below each other.

Clip skimming is a high-speed way to listen to the sound of a single audio clip in the timeline, without hearing any other clips above or below it.

NOTE: If you only have one layer of video or one layer of audio in the timeline, clip skimming will be the same as skimming and, therefore, not particularly helpful.

To turn on clip skimming either:

  • Choose: View > Clip Skimming
  • Type: Option + Cmd + S

Then drag the cursor across the clip in the timeline you want to hear.

Repeat this process to turn off clip skimming.


Please rate the helpfulness of this tip.

Click on a star to rate it!

… for Apple Motion

Tip #1440: How to Export a Partial Motion Project

Larry Jordan – LarryJordan.com

Play ranges make it easy to focus on small sections of your project.

Keyboard shortcuts associated with play ranges.

Topic $TipTopic

Most of the time, when you finish a Motion project, you want to export all of it. But, what do you do if you only want to export some of it? Easy. Watch.

The area just above the mini-timeline, where the playhead slides back and forth, is home to two other icons:

  • Play Range In
  • Play Range Out

Many times, when you are working on somewhat longer projects, you may want to focus just on playback within a portion of the timeline. These play range markers make that happen.

But, they also control what gets exported.

Set these, either by dragging or typing Shift + Cmd + I or O, to set a play range In and/or Out.

NOTE: Using the keyboard shortcuts jumps the appropriate play range marker to the position of the playhead.

Then, choose Share > Export Selection to Movie. Only that portion of the project contained between those two markers export.

To reset the markers, type Option + X.

EXTRA CREDIT

The screen shot shows other shortcuts for working with these markers.

These markers do not support saving a portion of a project as a Final Cut template. To retime a template, you would need to reconstruct it.


Please rate the helpfulness of this tip.

Click on a star to rate it!

… for Adobe Premiere Pro CC

Tip #1469: Set a Marker Range

Larry Jordan – LarryJordan.com

Marker durations are very useful for transcripts.

Set a marker duration in the Edit Marker dialog. A range marker is illustrated below.

Topic $TipTopic

Normally, a marker in Premiere indicates a specific point in time. However, you can extend a marker to cover a range in the timeline. This technique is good for adding transcriptions, marking selected regions of a quote, or whenever you need to indicate something that takes time.

Here’s how:

  • Add a marker to a clip or timeline.
  • Double-click the marker to open the Edit Marker dialog.
  • Change the Duration (top red arrow) timecode to reflect the duration of the marker.

NOTE: This measures the duration of a marker, not the marker’s location in the timeline.

EXTRA CREDIT

Once a duration is applied to a marker, you can change it by dragging either the start or ending marker to a new timeline location (bottom red arrow).


Please rate the helpfulness of this tip.

Click on a star to rate it!

… for Apple Motion

Tip #1448: 3D Navigation Controls

Larry Jordan – LarryJordan.com

These navigation controls appear once you add a camera to your project.

Enlarged view of the 3D navigation controls in Motion.

Topic $TipTopic

(I discovered this tip while researching a recent PowerUP webinar illustrating Cameras, Sets & Drop Zones in Apple Motion 5.5.)

Once you add a camera to a Motion project, three new navigation controls appear in the top right corner of the Canvas (Viewer). Here’s what they do.

The three controls – indicated by the red arrow in the screen shot – are designed to be clicked and dragged with the mouse. In all cases, these shift the display in the Canvas, they do not change the composition of elements in the project.

From left to right:

  • Move the Canvas up/down/left right.
  • Rotate the Canvas on the Z axis. (This is the traditional way to rotate anything.)
  • Move view either closer or farther away, again, along the Z axis.

EXTRA CREDIT

Double-click any icon to reset the screen to the default 0,0,0 centered location.

You can experiment with these by adding a camera (Object > New Camera), switch the Canvas from Active Camera to, say, Top view then tweak one of these controls.


Please rate the helpfulness of this tip.

Click on a star to rate it!

… for Apple Motion

Tip #1449: Add Depth of Field to a Camera

Larry Jordan – LarryJordan.com

Rendering Depth-of-Field is very processor intensive. Turn it off when you don’t need it.

Top view showing camera angle, far and near focus. Text displaying resulting depth of field.

Topic $TipTopic

(I discovered this tip while researching a recent PowerUP webinar illustrating Cameras, Sets & Drop Zones in Apple Motion 5.5.)

Depth of field (focus) can be added to any camera in Motion; though it is off by default. Here’s how to turn it on and adjust it.

  • Go to the Render menu in the top right corner of the Canvas (Viewer) and enable Depth of Field.
  • Add a camera to your project.
  • Select the camera, then, in Inspector > Camera, twirl down Depth of Field.
  • DOF Blur Amount. The amount of blurriness.
  • Near Focus. Indicated by a yellow line nearest the camera. This represents the nearest an object can be to the camera and still be in focus.
  • Far Focus. Indicated by a yellow line farthest from the camera. This represents the farthest an object can be to the camera and still be in focus.
  • Focus Offset. Drag this setting to roll the focus from foreground to background.

In this screen shot:

  • DOF Blur Amount: 60
  • Focus Offset: -2.0
  • Near Focus: 311
  • Far Focus: 0 (This is, generally, left at 0)
  • Camera Angle of View: 74°

EXTRA CREDIT

Use keyframes to animate Focus Offset to create a real-time roll focus.

Rendering depth-of-field is processor intensive. If playback is too slow, turn it on to set values, then turn off until ready to create final exports.


Please rate the helpfulness of this tip.

Click on a star to rate it!

… for Visual Effects

Tip #1461: Easy Sky Replacement in DaVinci Resolve

Larry Jordan – LarryJordan.com

Replacing a sky is a typical request even for smaller projects.

Image courtesy Motion Array.com

Topic $TipTopic

Replacing an undercast or overexposed sky is one of those techniques that, if your client sees you doing it once, they’ll want it every time! Luckily, there are plenty of tools built-in to DaVinci Resolve that make replacing a sky a breeze.

This article first appeared in MotionArray.com. This is a summary.

First up, there are multiple ways that this can be done. A composite like this can be achieved in the Cut, Edit, Color, and Fusion pages – and each toolset offers its own strengths and weaknesses. Today, we are going to use the Color page because it’s the most straightforward way to pull out the sky and draw a garbage matte around the buildings.

Here are the steps. The article provides step-by-step instructions, along with screen shots.

  • Step 1: Prepare Your Clips
  • Step 2: Key the Sky
  • Step 3: Place the Background
  • Step 4: Refine the Key with a Power Window
  • Step 5: Match the Elements with Color Correction
  • Step 6: Track an Object for the Sky
  • Step 7: Apply the Track Data to the New Sky

Now you know how to replace a sky in DaVinci Resolve using the Color page. What makes the Color page unique is that tools can easily be used in tandem. In our exercise we keyed the sky, refined the key with a Power Window as a Garbage Matte, and tracked the Garbage Matte – all in the same node.


Please rate the helpfulness of this tip.

Click on a star to rate it!

… for Apple Motion

Tip #1423: Messing with Transitions in Motion

Larry Jordan – LarryJordan.com

Motion provides lots of flexibility in designing transitions; starting with durations.

The blue bar displays the duration of the Transition A drop zone.

Topic $TipTopic

A “drop-zone” is a placeholder in Motion for video to be inserted by Final Cut Pro. By default, when you create a new Final Cut Transition in Apple Motion, it creates two special drop zones:

  • The green Transition A will display the video from the out-going clip.
  • The red Transition B will display the video from the in-coming clip.

Each of these two drop-zones runs for exactly one-half the duration of the transition itself, each represented by a blue bar in the mini-timeline (red arrow in screen shot).

However, these durations can easily be changed, which gives you more time to do interesting things with each clip.

Simply drag the edge of the blue bar for the selected drop-zone in the mini-timeline to change the duration. Then adjust scale, position, rotation in the Inspector, or add Filters and Behaviors. For example, you could have the new clip fly on screen as a black-and-white clip, flip around a few times, then zoom full-screen while switching to full color to end the transition.

The results might look tacky, but, well, it would certainly be eye-catching. In any case, consider the duration of each of these elements as totally flexible.


Please rate the helpfulness of this tip.

Click on a star to rate it!

… for Visual Effects

Tip #1443: More Free After Effects Tutorials

Larry Jordan – LarryJordan.com

MotionArray.com has dozens of free tutorials on their site.

Screen shot from a MotionArray tutorial.

Topic $TipTopic

MotionArray.com recently published more free After Effects tutorials on their website, with a special focus on text and typography.

Titles include:

  • Create 2 Dynamic Looping Backgrounds in After Effects
  • Learn 2 Popular Animations in After Effects
  • Easily Animate Individual Letters in After Effects
  • Create Your Own Kinetic Typography in After Effects
  • 2 Creative Text Reveal Animations in After Effects

And many more.

Here’s the link.


Please rate the helpfulness of this tip.

Click on a star to rate it!

… for Apple Final Cut Pro X

Tip #1426: Create a Stand-Alone Still Frame

Larry Jordan – LarryJordan.com

Stand-alone still frames are highly flexible separate pieces of media.

A still frame on the layer above the Primary Storyline.

Topic $TipTopic

One of the more helpful hidden features in Final Cut Pro is creating a stand-alone still frame. Most of the time, a hold frame (Shift + H) works fine.

But, when you need to create a separate piece of media that can be moved anywhere and trimmed to any length, still frames are the best choice. I use these constantly when I’m editing my webinars. Here’s how to create them.

NOTE: Be warned. Unlike a hold frame, still frames are separate media, meaning they are easy to move out of sync.

There are two options:

  1. Edit the still frame into the Primary Storyline, at the position of the playhead.
  2. Edit the still frame into a higher layer, at the position of the playhead.

To create a still frame and edit it into the Primary Storyline at the position of the playhead:

  • Put the playhead on the frame you want to freeze.
  • Type Option + F.
  • A still frame appears, with a duration equal to the still image duration set in Preferences > Editing > Still Image.

To create a still frame and edit it onto a higher layer at the position of the playhead:

  • Select the clip you want to create the still frame from.
  • Put the playhead on the frame you want to freeze.
  • Type Shift + F. This creates a match frame in the Browser.
  • Type Option + F. This edits the frame into position

Please rate the helpfulness of this tip.

Click on a star to rate it!

… for Visual Effects

Tip #1404: How to Comp a Shot in 3 Different Tools

Larry Jordan – LarryJordan.com

A closer look at the process of compositing.

Compositor Marijn Eken, who compared Nuke, Fusion and After Effects.

Topic $TipTopic

This article, written by Ian Failes and Marijn Eken, first appeared in VFXVoice.com. This is a summary.

Visual effects artists already know there are often many ways you can pull off a particular shot via different filming methods and with different tools and techniques. That’s certainly the case with compositing, where several pieces of software and compositing workflows can be used.

Here, visual effects artist Marijn Eken – who has worked as a compositor at studios including DNEG, Scanline VFX and RISE | Visual Effects Studios, and currently teaches at the Netherlands Film Academy – explains how he might tackle compositing of the same shot in three separate packages. These are Foundry’s Nuke, Blackmagic Design’s Fusion (inside DaVinci Resolve) and Adobe After Effects, arguably the three most accessible compositing tools.

The elements supplied to Eken were stock footage of a woman pinch-zooming a greenscreen and the marker-covered tablet, and a photograph of the space shuttle Endeavour taken at California Science Center, with the idea being that she would be zooming into an area of the photograph on the device.

In coming up with a methodology for approaching this relatively simple composite in the three different packages, Eken generally followed these steps:

  1. Track the four corners.
  2. Use the corner pin method to composite the image over the screen.
  3. Track the two fingers on the screen and use that to position and zoom the image.
  4. Apply grading on the inserted image to match the black levels and white point.
  5. Use the greenscreen and some roto to separate the hand and composite it on top.

The article then illustrates in detail how he approached this task in each of the three software. (Link)


Please rate the helpfulness of this tip.

Click on a star to rate it!