… for Apple Motion

Tip #1719: What Are Parameter Behaviors?

Larry Jordan – LarryJordan.com

You apply parameter behaviors to a setting, not an object.

An animated frost effect, using the Wriggle parameter behavior.

Topic $TipTopic

Parameter behaviors are an advanced technique that, rather than manipulating an object, manipulates a setting (parameter) associated with an object.

These can create some very subtle effects. Here’s how this works.

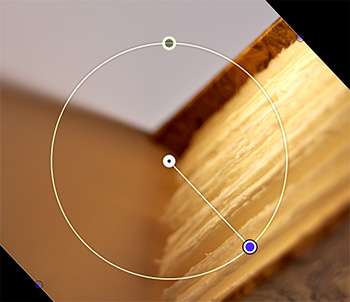
  • Using the Circle tool, draw an oval in the Viewer.
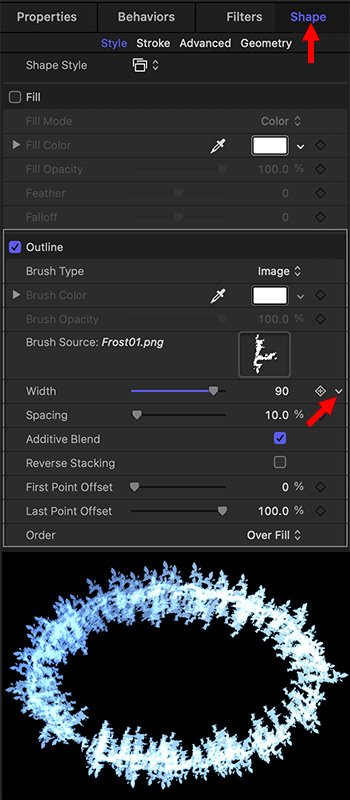
  • In the HUD, turn off Fill, increase the width to, say, 90. and assign a Shape Style. (In this example, I used Garnish > Frost Heavy.)
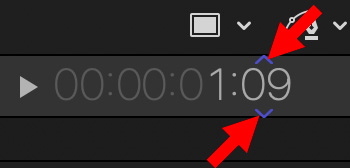
  • In Inspector > Shape, click the small arrow to the right of Width (lower red arrow), and choose Add Parameter Behavior > Wriggle.
  • Play the timeline and see how the Frost border wriggles.

Cool.

EXTRA CREDIT

You can assign multiple parameter behaviors to the same setting. This is a great way to animate movement in non-traditional ways.


Please rate the helpfulness of this tip.

Click on a star to rate it!

… for Apple Motion

Tip #1701: Very Fast, But Hidden, Skimming Trick

Larry Jordan – LarryJordan.com

The secret is to drag a number that isn’t hours or frames.

When the blue arrows are visible, dragging a number enables high-speed timeline skimming.

Topic $TipTopic

There are so many hidden mouse shortcuts in Motion that it is impossible to find them all. But here’s one that’s both hidden and useful.

Take a look at the screen shot. See those little blue arrows above and below the timecode frame number at the bottom center of the Viewer?

NOTE: To display these, hover over a number in the timecode display.

When those arrows are visible, drag the timecode number up or down to quickly skim the timeline.

BUT, here’s the secret:

  • When you drag over the frames number, you are skimming the timeline by frames.
  • When you drag over the seconds number, you are skimming the timeline by seconds (faster)
  • When you drag over the minutes number, you are skimming the timeline by minutes (REALLY faster)
  • When you drag over the hours number, well, your eyes will get whiplash.

Please rate the helpfulness of this tip.

Click on a star to rate it!

… for Apple Motion

Tip #1702: Four Dragging Tips to Speed Resizing

Larry Jordan – LarryJordan.com

These keyboard shortcuts make resizing images faster and/or more accurate.

Pressing Shift constrains rotation to 45°; the yellow dot (top) indicates starting position.

Topic $TipTopic

Here are four dragging tips when resizing media in the Motion Viewer that can make image handling faster and easier.

Tip 1 – Rotation

Press the Shift key while dragging the blue rotation dot in the Viewer. This constrains rotation to 45° increments.

Tip 2 – Resizing

Press Shift while dragging a corner blue resizing dot for an image in the Viewer to constrain the aspect ratio to it’s original dimensions.

Tip 3 – Centering

Press Option while dragging a blue resizing dot in the Viewer to scale the image size from the center (you are dragging the opposite edge at the same time, by the same amount).

NOTE: Yes, you can press both Shift and Option while dragging to constrain the aspect ratio and resize from the center.

Tip 4 – Copying

Press Option while dragging an image in the Viewer to make a copy of the original image, then reposition the copy.


Please rate the helpfulness of this tip.

Click on a star to rate it!

… for Apple Motion

Tip #1703: Make an Element Invisible – FAST!

Larry Jordan – LarryJordan.com

Both menu and shortcut quickly toggle an element’s visibility

To make any element invisible, Control-click it in the Layers panel and uncheck Active.

Topic $TipTopic

By default all elements in the Motion Layers panel are visible. But, sometimes, you want to hide something so you can see what’s below it. Here’s how.

  • Control-click the element you want to temporarily hide in the Layers panel.
  • Deselect Active. (Shortcut: Control + T)
  • Repeat this process to make the element visible again.

EXTRA CREDIT

Any invisible elements will be saved, but not exported.


Please rate the helpfulness of this tip.

Click on a star to rate it!

… for Apple Motion

Tip #1682: Explore Hidden Artwork

Larry Jordan – LarryJordan.com

Compositions contain animation and graphics not found in the Motion Library.

These composition graphics do not appear in the Motion Library.

Topic $TipTopic

Most of the time, I encourage you to skip the templates and compositions in the Apple Motion Project Browser and dive right into Motion itself. But, I discovered something today that modified my opinion.

Open Motion and look in the sidebar on the left side of the Project Browser. There you’ll find a variety of compositions. These are Motion projects saved as templates that you can use in your own work.

What I realized is that the artwork in these does not appear in the Motion Library. For example, the screen shot illustrates car, heart and text graphics that aren’t in the Motion Library. (I didn’t verify all the compositions, but it seems that most of their art work does not appear in the Library.)

Each is animated and, though the animation tools exist in Motion, they are applied in ways that are may be useful to learn.

So, the next time you open Motion, take a look at these compositions. You may find some artwork – or animation – that you can use in your own projects.

EXTRA CREDIT

To open a Composition, simply double-click it in the Project Browser.


Please rate the helpfulness of this tip.

Click on a star to rate it!

… for Apple Motion

Tip #1683: Change a Motion Project Duration

Larry Jordan – LarryJordan.com

Changing durations is possible, but it requires a lot of manual clean-up.

Project duration is changed in Inspector > Properties.

Topic $TipTopic

It’s possible to change the duration of a Motion project – but it isn’t always wise. Learn more.

The absolutely best place to change the duration of a Motion project is in the Project Browser before you add any elements into the project. At that point, you can create whatever duration you want.

You can still change it after you’ve started editing, but you probably won’t like the results.

To change the duration:

  • Select the Project name in the Layers panel.
  • Open Inspector > Properties.
  • Half-way down the Duration of the currently selected project is displayed (see screen shot).

However – if media is edited into the project:

  • You can’t make it shorter than the existing media placed into the Layers panel (though there’s a work-around I’ll discuss in a minute).
  • You can make it longer, but none of your media or effects are adjusted for the new length.

WORK-AROUND. If you first make a project longer than its current duration, you can then make it shorter than its current duration, except that, again, none of your media or effects are adjusted.

This means that changing duration after media is added into a project requires you to change all media and effects locations and durations manually to conform them to the new timing.


Please rate the helpfulness of this tip.

Click on a star to rate it!

… for Apple Motion

Tip #1684: A Fast Way to Change the Background

Larry Jordan – LarryJordan.com

By default, backgrounds are transparent; but you can change that.

These two options (red arrows) determine the state and color of a Motion project background.

Topic $TipTopic

By default, Apple Motion places all elements over a transparent background. This means that, when you export the finished movie, it can be easily superimposed over video regardless of whether you use Avid, or Adobe or Apple software.

But, what if you don’t want the background to be transparent? Motion has a very easy way to change it to something solid.

  • Select the Project name in the Layers panel.
  • Go to Inspector > Properties.
  • Scroll down to the bottom.
  • Set the Background (bottom red arrow) to Solid.
  • Set the Background Color to whatever color you want for your project.

Now, when you export, your file will include a solid background.

EXTRA CREDIT

The difference between Solid and Environment is that, while both are solid, Environment “interacts with [a] 3D project, including blend modes and reflections.” (Apple Help)


Please rate the helpfulness of this tip.

Click on a star to rate it!

… for Apple Motion

Tip #1673: Replicator Effect: Chop Sticks

Larry Jordan – LarryJordan.com

Replicators are designed to generate repeating patterns.

The Chop Sticks replicator with a variable blur applied.

Topic $TipTopic

Apple Motion gives us a lot of visual toys to play with as we create motion graphics. Here’s one you may not have looked at very carefully: Replicators.

Replicators take an object and create a pattern from it. For example, creating a repeating pattern from a company logo.

While not as dynamic as a particle system, there are things we can do with replicators that particles can’t.

NOTE: A good place to look is in the Replicators category in the Motion Library. Remember, you can ALWAYS add filters to change the look of any replicator.

The screen shot is an example: Chop Sticks. These green and blue floating rectangles can serve as an eye-catching intro to an ad or open.

What I did here was add a variable blur (Filters > Blur > Variable Blur) to the replicator. This instantly provides a sense of depth (and depth of field) to the image.

EXTRA CREDIT

Like particle systems, replicators can move in 3D space. Or, when we apply a variable blur, they can just LOOK like they are moving in 3D.


Please rate the helpfulness of this tip.

Click on a star to rate it!

… for Apple Motion

Tip #1674: Make a Particle System 3D

Larry Jordan – LarryJordan.com

Switching a particle system to 3D takes just one mouse click.

The 3D checkbox – Inspector > Emitter (top) – and a field of flying baseballs.

Topic $TipTopic

Particles, like cameras, lights, replicators and 3D Objects, can expand into 3D space. (All other Motion elements are 2D.) However, by default, all particle systems are set to 2D. Here’s how to make the switch.

  • Add the particle system you want to use into the Viewer. (Library > Particle Emitters).

NOTE: This setting also works for particle systems you create – again, the default is 2D.

  • Select the name of the particle emitter in the Layers panel, not the group you moved it into.
  • Open Inspector > Emitter and check the 3D check box (top of screen shot).
  • A warning message appears reminding you to switch the group containing the particle system to 3D. Click the blue button to make the switch.

Done. Now, the particle system occupies volume as well as a position in space.

NOTE: Depending upon what particles are used to create the system, you can dolly through a particle cloud and see individual particles! It will take experimenting to find what works best for you – and you’ll need to render to see movement at full speed.

EXTRA CREDIT

In the lower screen shot, we see a camera dollying through a field of flying baseballs. The baseballs are the 3D baseball object that was turned into a particle system.


Please rate the helpfulness of this tip.

Click on a star to rate it!

… for Apple Motion

Tip #1675: View Control Icons in Motion

Larry Jordan – LarryJordan.com

These icons control the view, not the image you are creating.

These four icons move your view, without affecting your project.

Topic $TipTopic

When you add a camera or light to create a 3D group, three or four icons appear in the top right corner of the Viewer. Here’s what they mean.

Looking at the screen shot, the camera icon only appears when you add a camera into a project. This icon appears when you are looking at the camera view. If you view the scene from the top or side, this icon disappears. This icon reminds you when you are seeing the view the audience will see, or, more importantly, when you are NOT seeing it.

Dragging the four-arrow icon moves the view in the Viewer – NOT the image you are creating – left / right or up / down. The actual direction you move is dependent upon your view. Looking at the scene from the front, left/right is actually left and right. Looking at the scene from the side, left / right actually means front and back.

The rotating arrow rotates the view on whatever axis is perpendicular to your monitor – which, again, depends upon your view.

The far right arrow moves you forward or back in depth.

EXTRA CREDIT

Some of these options will be grayed out when you add a light without adding a camera. And, to stress, this changes your view, but not your project.


Please rate the helpfulness of this tip.

Click on a star to rate it!