… for Apple Final Cut Pro X

Tip #927: Make Compound Clips Independent

Larry Jordan – LarryJordan.com

Compound clips are dynamic, unless you make them independent.

The middle compound clip is independent of those around it.

Topic $TipTopic

By default, when you change the contents of a compound clip in the timeline, you change every occurrence of that compound clip wherever it appears. Sometimes, that’s what you want. Here’s what to do when it isn’t.

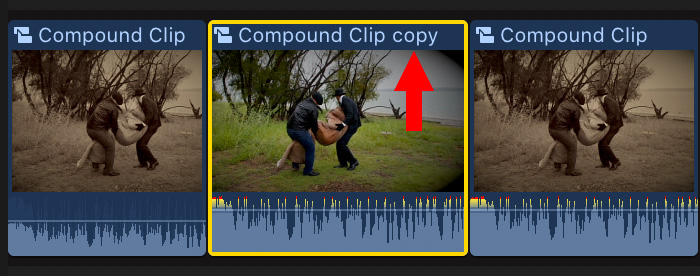
When you want to change one compound clip, without changing all other clips linked to it, select the compound clip you want to isolate, then choose Clip > Reference New Parent Clip.

This creates an independent copy of the original compound clip. You can then make changes to it, without those changes appearing anywhere else.

EXTRA CREDIT

  • To change the contents of a compound clip, double-click it.
  • To close a compound clip, open any other project into the timeline.

Please rate the helpfulness of this tip.

Click on a star to rate it!

… for Apple Final Cut Pro X

Tip #906: How to Display 360 VR Video

Larry Jordan – LarryJordan.com

Final Cut can display and navigate 360 VR video on screen and on headset.

“Normal” display (top) and 360 VR view (bottom). Image courtesy of Allynn Wilkinson.

Topic $TipTopic

360 VR shoots video with the camera at the center of a sphere. You can look around, up or down inside the image as if you were standing still and turning your head.

Final Cut Pro X supports editing and exporting 360 VR video – but, by default, the Viewer does not display it properly. (See screen shot.)

To display 360 VR:

  • Create a new project, and make sure the settings match your 360 VR clip.
  • Choose View > Show in Viewer > 360° (Shortcut: Option + Cmd + 7).
  • Move around the image by dragging inside the 360 view.
  • Adjust the position of the center using the slider in the top left corner. However, this is best left at the default setting of 90°.

While 360 VR is designed for the viewer to move around the shot, you can set the default opening angle by clicking the Reorient (“world”) icon in the low-left corner of the 360° Viewer, then adjusting the shot to suit.

EXTRA CREDIT

You can precisely change the default framing for the selected clip using the Reorient settings in the Inspector.


Please rate the helpfulness of this tip.

Click on a star to rate it!

… for Apple Final Cut Pro X

Tip #908: Add Transitions to 360 VR Video

Larry Jordan – LarryJordan.com

Transitions need to be used sparingly. Think of VR more as live theater than film.

Note the difference in controls for a VR transition.

Topic $TipTopic

The key concept you need to understand about 360 VR video is that, because the video is a sphere, you need to edit as little as possible. However, you can still add transitions. Here’s how.

With normal video, most transitions start at the edge of the frame. But, with 360 VR, there is no edge – the entire image is a sphere. Moving in for a closeup on one side means moving away from a close-up on the other side of the sphere.

In traditional film, we bring the camera closer to the actor. In 360 VR, we bring the actor closer to the camera.

This “sphere-ness” also affects transitions. A traditional transition doesn’t understand that there’s an up or down to the image. This means that you need to pick transitions from the Transitions > 360° category.

Then, go to the Inspector and adjust the Longitude (starting point), Direction and Speed to get the effect you want.

EXTRA CREDIT

Remember, unlike traditional film, you can’t assume where the viewer will be looking. Since you are shooting a sphere, the viewer could be looking anywhere within it when your transition starts.

Soft edges are always a good idea.


Please rate the helpfulness of this tip.

Click on a star to rate it!

… for Apple Final Cut Pro X

Tip #909: Add a 360 VR Title

Larry Jordan – LarryJordan.com

360 VR titles are positioned using the Reorient settings, not text positions.

The 360° Basic 3D title, Constantia font, positioned using Inspector > Reorient. (Image courtesy of Allynn Wilkinson.)

Topic $TipTopic

In traditional film, titles are fixed in relation to the frame. In 360 VR, they are locked to a specific position in the image. This means titles don’t “float,” they appear or disappear depending where in the VR sphere the viewer is looking.

This makes adding titles trickier because you can’t assume the viewer will actually see them if they are looking somewhere else.

Final Cut includes seven different 360° title templates. These are essentially the same, except for their built-in animation.

Unlike other titles, though, you position them using the Video Inspector > Reorient settings (see screen shot).

Keep in mind that if the viewer is looking somewhere else in the frame, they won’t see your title. For this reason keep titles on screen much longer than you would use for a “normal” film.

EXTRA CREDIT

It might help to think of titles more as “labels” than “titles.”


Please rate the helpfulness of this tip.

Click on a star to rate it!

… for Apple Final Cut Pro X

Tip #888: Secrets of the Custom Title

Larry Jordan – LarryJordan.com

Animation can be per letter, word, line or the entire graphic.

Lines starting with “In” control opening animation. while those with “Out” control ending animation.

Topic $TipTopic

With hundreds of titles to choose from in Final Cut Pro X’s Titles Browser, it is easy to overlook a single title. However the Custom title has more animation controls than any other title in Final Cut.

In addition to extensive text formatting controls, clicking the Text Animation Inspector (blue in the screen shot) reveals 26 major animation settings; all in one title. To find it, search for “Custom” in the Titles Browser.

NOTE: There are three Custom titles, one for VR, one for 3D and one for 2D. All have a wide variety of animation settings. This tip describes the 2D title.

Those parameters that start with “In” determine how text enters the screen. Those that start with “Out” determine how text leaves the screen. Both Ins and Outs can be set separately. By default, the text just sits there until you change a setting.

These settings are easier to see by playing with them rather than describe each one – and you can use them in combination with each other. However, there are three I want to call to your attention:

  • Unit Size. This sets whether animation is by letter, word, word without spaces, lines, or the entire block of text.
  • Duration. This determines how fast the animation occurs.
  • Speed. This controls acceleration and deceleration. “Ease Out” means as the effect starts, “Ease In” means as the effect ends.

The easiest setting to play with is Opacity. This fades letters in or out, depending upon the setting. Once you see how this works, you’ll understand how to tweak the others.

If you haven’t played with this title yet, you’ll discover it contains a wealth of animation possibilities… all without using keyframes.


Please rate the helpfulness of this tip.

Click on a star to rate it!

… for Apple Final Cut Pro X

Tip #889: A Fast Instant Replay

Larry Jordan – LarryJordan.com

Instant Replay adds visual emphasis to action with almost no work.

The Stopwatch retiming menu in the lower left corner of the Viewer.

Topic $TipTopic

If you need to create a highlights reel with slow-motion effects, Instant Replay can save you a ton of time. Here’s how it works.

  • Using the Range tool (Shortcut: R), select the section of action that you want to replay then, from the Stopwatch icon in the lower portion of the Viewer, choose Instant Replay. (See screen shot.)
  • From this menu, select whether you want to footage replayed at 100%, 50%, 25% or 10% of normal speed.
  • When you select a speed option, Final Cut copies the footage, slows it to your selected speed, then places an “Instant Replay” animated title in the top right corner of the video.

If you don’t like the effect, select the entire clip and type Shift + N to return it to normal speed.

EXTRA CREDIT

An even cooler effect is to first select Rewind, to “rewind the tape,” then Instant Replay.

Both of these can quickly add visual emphasis to key action without a lot of work from the editor.


Please rate the helpfulness of this tip.

Click on a star to rate it!

… for Apple Final Cut Pro X

Tip #890: Better Effect Previews

Larry Jordan – LarryJordan.com

Option-dragging previews adjusting the principal parameter before applying an effect.

Hovering over a Gaussian Blur effect.

Topic $TipTopic

Final Cut Pro X allows you to preview effects two different ways before you apply them to a clip. One you probably know, the other you probably don’t.

To preview any effect in the Effects Browser:

  • Select a clip in the timeline.
  • Hover the cursor over an effect in the Effects Browser.
  • The timeline clip will appear in the Viewer as though the effect was applied.
  • Next, press the Option key while hovering. This previews the effect AND changes the principal parameter for the effect as you drag; from not applied on the left to fully applied on the right.

NOTE: Try this using Blur > Gaussian to quickly see how this works.

This is a great way to see what an effect will look like, even after tweaking, before applying it.

EXTRA CREDIT

To apply an effect, either:

  • Drag the effect on top of a timeline clip
  • Select one or more clips in the timeline and double-click an effect in the Effects Browser

To remove all effects from a clip, select the clip and choose Edit > Remove Effects.


Please rate the helpfulness of this tip.

Click on a star to rate it!

… for Apple Final Cut Pro X

Tip #870: Change the Look of a Dissolve

Larry Jordan – LarryJordan.com

Add looks to have dissolves contribute to the story you are telling.

The Look options for the default cross-dissolve transition in Final Cut.

Topic $TipTopic

I discovered this tip while researching a recent webinar covering the basics of editing in Final Cut Pro X. There are two hidden settings in every cross-dissolve that will change the look of a transition.

  • Apply the transition to an edit point.

NOTE: Since this is the default transition, the easiest way to add a dissolve is to select the edit point, then type Cmd + T.

  • Select the transition, then go the Inspector (see screen shot). There, you’ll find a dozen different settings in the Look menu that can be applied to any cross-dissolve. Experiment with these to see what they do.

NOTE: Inspector settings vary by transition.

The other option is Ease. This allows you to change the speed of entering and exiting a dissolve based upon the Ease Amount.

  • In. Affects the speed at the start of the transition.
  • Out. Affects the speed at the end of the transition
  • In & Out. Affects both the start and end of the transition.

NOTE: These speed changes are subtle and are only visible for longer transitions; say, two seconds or more.


Please rate the helpfulness of this tip.

Click on a star to rate it!

… for Apple Final Cut Pro X

Tip #871: A Faster Way to Change Durations

Larry Jordan – LarryJordan.com

I use this technique in virtually every project – especially for transitions.

Setting a duration in the timecode display.

Topic $TipTopic

I illustrated this tip while presenting a recent webinar covering the basics of editing in Final Cut Pro X.

We all know that we can change the duration of a clip, title or transition by grabbing an edge and dragging. But, there is a faster way – using timecode.

To use this technique:

  • Select a clip, group of clips, transition, title or other timeline element.
  • Type Control + D. This automatically opens and selects the Duration field in the Timecode window.
  • Type the duration you want to enter, without entering any punctuation.

Final Cut will automatically calculate the correct time based upon the frame rate of the project. For example, if you have a 30 fps project and type:

  • 30 – Final Cut enters: 1:00
  • 120 – Final Cut enters: 1:20
  • 45 – Final Cut enters: 1:15
  • 325 – Final Cut enters 3;25
  • 1234567 – Final Cut enters: 1:23:47:07 (Um, that one I had to check…)

Please rate the helpfulness of this tip.

Click on a star to rate it!

… for Apple Final Cut Pro X

Tip #872: The Strange Case of the Yellow Dots

Larry Jordan – LarryJordan.com

These yellow “drop zones” simplify customizing complex transitions.

The Pan Far Right transition with drop zones for clips before and after it.

Topic $TipTopic

I remembered this tip while researching a recent webinar covering the basics of editing in Final Cut Pro X.

Most of the time, when you add a transition to a clip, all you need to do is adjust the timing and, maybe, tweak the settings in the Inspector. But, in a few cases, strange yellow dots appear (see screen shot).

These yellow dots are drop zones, placeholders for images that will be supplied by the clips in the timeline. As the transition progresses, these different images appear in the animated background.

NOTE: These yellow dots provide still images, the only images that move are the two on either side of the transition itself.

To reposition a yellow dot, drag it to the frame you want displayed. You can even move them to the other side of the transition, if that helps.

EXTRA CREDIT

You’ll find most of these multi-image transitions in the Stylized category.

NOTE: If you haven’t looked at the transitions in Replicators/Clones and Stylized recently, it is worth your time to review these again.


Please rate the helpfulness of this tip.

Click on a star to rate it!